
Staircase lighting ideas: safe steps, beautiful lines
Stairs need light that shows every edge without glaring into your eyes on the way down. Step lights, handrail profiles, wall lights and stairwell pendants, planned for safety and for beauty.
A staircase is the one place in a home where poor light can genuinely hurt you. It is also, in many houses and villas, a piece of architecture worth showing off: a floating oak flight, a curved stone stair, a steel spiral. Good staircase lighting achieves both goals with the same means. It makes every step readable, and it draws the line of the stair in light.
What safe stair light actually needs
The key to safety is not brightness but contrast. You need to see where each tread ends and the next begins. Light that grazes along the treads from the side, or falls from slightly above and in front, creates a soft shadow under each (the front edge of a step) and makes the rhythm of the stair easy to read.
Light from directly behind you, by contrast, throws your own shadow ahead onto the steps. Light at eye level in front of you dazzles when you walk down. matters more on stairs than anywhere else, because the descending view is the one where a misstep is most dangerous.
Light both ends of every flight and every landing, and make sure the light can be switched from the top and the bottom. Motion sensors with a slow fade are an elegant solution: the stair lights up as you approach and dims again after you pass.
Seven staircase lighting ideas
Design ideas
- 01
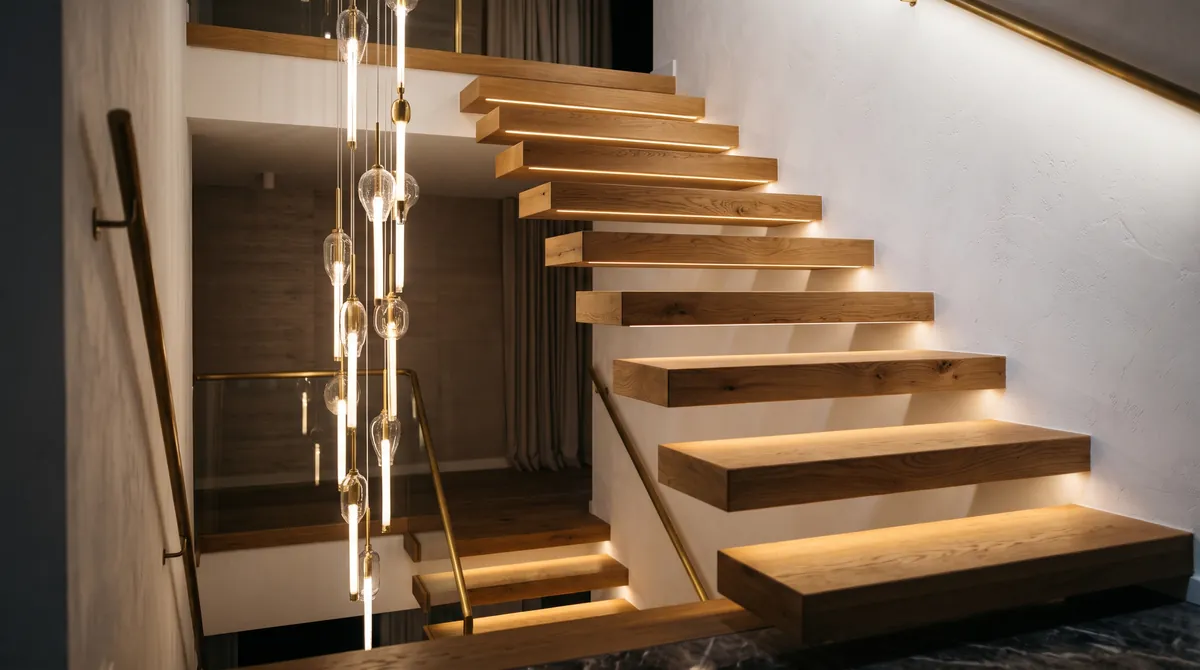
Light lines under floating treads
Integrate a warm LED line beneath the front edge of each floating tread so light spills down onto the step below. The stair appears to hover and every edge is clearly drawn.
- 02
Recessed step lights in the wall
Set small recessed lights into the side wall about 20 to 30 cm (8 to 12 inches) above the treads, on every step or every second step. Choose fittings with a louvre or shielded opening that cast light down onto the tread, not into your eyes.
- 03
An LED handrail
A slim LED profile milled into the underside of a timber or metal handrail lights the treads from just below hand height and guides the hand at night.
- 04
A tall pendant in the stairwell
In a stairwell that spans two or three floors, hang a long vertical pendant or a cascade of small lights down the open centre of the stair. It links the floors visually and is seen from every landing.
- 05
Wall lights that climb with the stair
Mount wall lights at a constant height above the line of the treads, about 170 to 180 cm (67 to 71 inches), so they rise with the stair. Fittings that throw light up and down wash the wall and light the steps at the same time.
- 06
Grazing light on a stone wall
A concealed light line at the top of a stone or plaster wall beside the stair washes down its texture and gives generous general light without a visible source.
- 07
Night orientation mode
Set the step lights to stay on at about ten per cent output through the night and to rise to full level when a sensor detects movement. Nobody has to fumble for a switch in the dark.
Placement, heights and distances
Many measurements on a stair refer to the , the imaginary sloping line that connects the front edges of the treads.
- Step lights in the wall: about 20 to 30 cm (8 to 12 inches) above the tread, close to the front edge of the step, on every step or at a steady interval.
- Handrail lights: the handrail usually sits about 85 to 100 cm (34 to 39 inches) above the pitch line, depending on local building rules. Light integrated there falls close to the treads and does not glare.
- Wall lights: at a constant height above the pitch line, high enough that nobody brushes against them, and never at eye level facing someone at the top of a flight.
- Stairwell pendants: keep at least about 2.1 metres (7 feet) of clearance wherever people pass beneath, on every level.
- Landings: give every landing and turn its own light, as people change direction there and look ahead to the next flight.
Colour temperature, materials and contrast
Stair light should be warm, around 2,700 K, matching the rooms it connects. For night orientation, 2,200 K or an amber tone is gentler on eyes used to the dark. Choose a CRI of 90 or more if the stair is made of fine timber or stone, so its colour stays true.
Materials change how light behaves. Polished stone and lacquered treads reflect light sources as bright spots, so keep fittings shielded and indirect. Matt oak, brushed concrete and limestone take grazing light beautifully. Dark carpet absorbs light and reduces contrast, so a light line at each nosing is worth considering there. Nosings in a contrasting colour or material add safety without any light at all.
Sensors, switches and safety
Two-way switching at the top and bottom of every flight is the minimum. Motion sensors take this further: choose ones with a gradual fade in and out and a sensible run-on time, so the light does not switch off while someone is still on the stair. In a family home, a permanent low night level is often better than sensors alone.
Integrated step lights, handrail profiles and sensors involve fixed wiring, transformers and drivers. They are jobs for a qualified electrician and are best planned before the staircase is built, as cables in stone or timber are hard to add later.
Common mistakes
- A single ceiling light at the top of the stair, which casts your shadow onto the steps when you walk down.
- Exposed bright step lights that glare into the eyes of someone descending.
- Even, flat light that removes all contrast between the treads.
- Dark landings and turns.
- Sensors that switch off too quickly or snap on at full brightness at night.
A well-lit staircase is quietly reassuring. The edges are clear, the line of the stair glows, and at night a soft trail of light leads you up to bed.
glaminia is independent and does not sell lamps or recommend dealers. Images are AI generated illustrations, not photographs of specific products. Have fixed electrical work done by a qualified electrician.